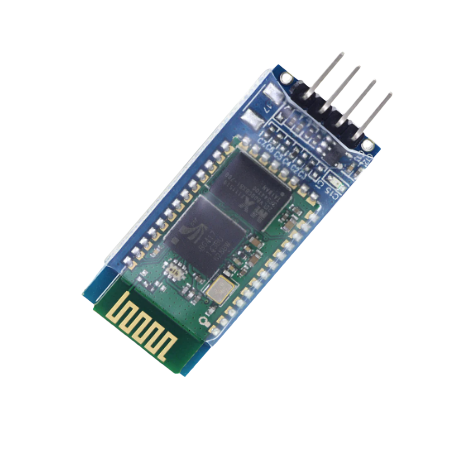


Bluetooth Module
Description
In this article, we will analyze the Bluetooth module and its compatibility with Arduino.
The HC-06 core module's main interface includes pins for VCC, GND, TXD, RXD, and KEY. The KEY pin triggers a high signal to clear pairing information and initiate a new search.
The LED indicates the Bluetooth connection status. A slow flash means it is unpaired, while a steady flash means it is paired but not as a slave connection. Always connect to the machine properly.
It is important to note that the opening distance is most effective within a range of 10 meters. While it is possible to exceed this distance, it may result in a less reliable connection.
The pair later when full-duplex serial use, do not need to know anything about the Bluetooth protocol, but only supports 8 data bits, 1 stop bit, no parity communication format, which is the most commonly used communication format does not support other formats.
Support to establish a Bluetooth connection through AT commands set the baud rate, passkey, set parameters are saved after. Bluetooth connection is automatically switched to the pass-through mode.
Please note that the backplate settings for the LDO input voltage should be between 3.6V to 6V. The unpaired current should be around 30mA and paired current should be around 10mA. It is important to not exceed an input voltage of 7V and to never apply reverse power.
Sensor Details
Bluetooth Version 2.0: The HC-06 module is based on the Bluetooth 2.0 standard, which provides a relatively stable and reliable wireless communication protocol.
Serial Port Profile (SPP): It supports the Serial Port Profile, allowing it to emulate a serial communication interface (UART) over Bluetooth. This makes it easy to establish a wireless serial connection between the module and other devices like microcontrollers, Arduino boards, and computers.
Low-Cost Solution: HC-06 is an inexpensive Bluetooth module, making it an affordable choice for hobbyists and DIY projects.
Simple to Use: It is designed to be straightforward and easy to use, especially for beginners. By connecting the module's TX and RX pins to the UART pins of a microcontroller, you can enable wireless communication with minimal setup.
Operating Voltage: The module typically operates at 3.3V, which is compatible with many microcontrollers and logic level systems.
Baud Rate Configurability: The HC-06 module's default baud rate is usually set to 9600 bps, but you can reconfigure it to different baud rates using AT commands, allowing you to adapt it to your project's specific requirements.
Range: The effective range of the HC-06 module is typically around 10 meters (approximately 33 feet) in an open space without any obstructions. The range may vary depending on environmental factors and potential interference.
Master and Slave Modes: The module can be set in either "Master" or "Slave" mode. In "Slave" mode, it can be paired with other Bluetooth devices that support SPP, while in "Master" mode, it can initiate connections with other Bluetooth modules in "Slave" mode.
AT Commands: The HC-06 module can be configured and controlled using AT commands sent over the UART interface. These commands allow you to change parameters such as the baud rate, Bluetooth device name, pairing mode, etc.
Status Indication: Many HC-06 modules come with a status LED that provides visual feedback about the current operating mode (pairing, connected, etc.), helping with troubleshooting and monitoring the module's status.
Compatibility: It can be easily integrated into various projects, including home automation, robotics, wireless sensor networks, and more.
Wiring Details
- Connect the VCC pin of the HC-06 module to the 5V pin on the Arduino board.
- Connect the GND pin of the HC-06 module to the GND pin on the Arduino board.
- Connect the TX pin of the HC-06 module to the RX pin (pin 0) on the Arduino board.
- Connect the RX pin of the HC-06 module to the TX pin (pin 1) on the Arduino board.
Note: The TX pin of the HC-06 module should be connected to the RX pin of the Arduino, and vice versa
Circuit Image

Circuit Code
void setup() {

  Serial.begin(9600);  // Initialize Serial communication at 9600 bps

}

void loop() {

  if (Serial.available()) {

    char data = Serial.read();  // Read data from HC-06 module

    Serial.print("Received: ");

    Serial.println(data);       // Print received data on Serial Monitor

  }

}