

RFID
Description
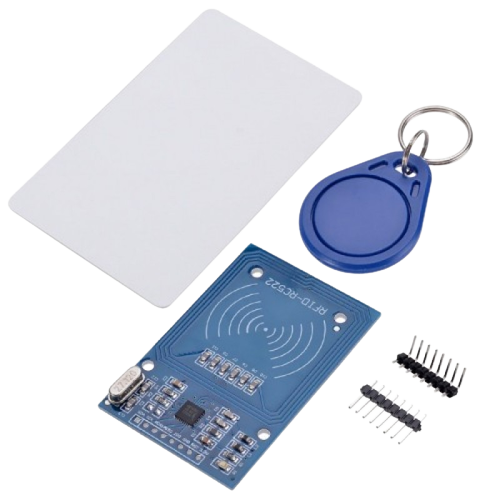
RFID uses electromagnetic waves in the radio frequency spectrum for communication and data transfer. RFID tags are used in many industries and you can find them in product tags from stores to security access cards. RFID tags can expedite the checkout and can be used for antitheft measures. They can be also used for identifying livestock, products, etc. In this tutorial, we will learn how we can use the RFID technology with the Arduino. We will learn how to interface an RC522 RFID reader with the Arduino.
Tags: RFID tags are small electronic devices that contain a microchip and an antenna. The microchip stores information about the tagged object, and the antenna allows the tag to communicate with RFID readers.
Readers: RFID readers are devices that emit radio waves and receive signals from RFID tags. They can be fixed or handheld and are used to read the information stored on the tags. Readers can be connected to a computer system for data processing.
Sensor Details
RC522 RFID Reader/Writer Module Pinout
The RC522 module has a total of 8 pins. This module supports various communication protocols and each pin has a different function for each communication protocol. The pinout of a RFID Reader module is as follows:
SDA SCL I2C Communication pins. DATA and CLOCK.
SS SCK MOSI MISO SPI communication pins. Slave Select, Clock, MOSI, and MISO.
RX TX UART Communication pins.
IRQ Interrupt signal from the module to indicate RFID tag detection.
GND Ground pin that needs to be connected to the GND pin on the Arduino.
RST Reset pin for the module
VCC Supply pin for the module. The supply voltage can be anywhere from 2.5V to 3.3V and must be connected to the 3.3V pin on the Arduino.
Specifications
- Input voltage: 3.3V
- Frequency: 13.56MHz
Library download
Here’s the library you need for this project:
- Download the RFID library here created by miguelbalboa
- Unzip the RFID library
- Install the RFID library in your Arduino IDE
- Restart your Arduino IDE
Wiring Details
Connect RFID SDA pin to Arduino D10 pin
Connect RFID SCK pin to Arduino D13 pin
Connect RFID MOSI pin to Arduino D11 pin
Connect RFID MISO pin to Arduino D12 pin
Unconnect RFID IRQ pin
Connect RFID GND pin to Arduino GND pin
Connect RFID RST pin to Arduino D09 pin
Connect RFID 3.3V pin to Arduino 3.3V pin
Caution: You must power this device to 3.3V!
Circuit Image

Circuit Code
#include <SPI.h>

#include <MFRC522.h>


#define SS_PIN 10

#define RST_PIN 9

MFRC522 mfrc522(SS_PIN, RST_PIN);   // Create MFRC522 instance.


void setup()

{

  Serial.begin(9600);   // Initiate a serial communication

  SPI.begin();      // Initiate  SPI bus

  mfrc522.PCD_Init();   // Initiate MFRC522

  Serial.println("Approximate your card to the reader...");

  Serial.println();


}

void loop()

{

  // Look for new cards

  if ( ! mfrc522.PICC_IsNewCardPresent())

  {

    return;

  }

  // Select one of the cards

  if ( ! mfrc522.PICC_ReadCardSerial())

  {

    return;

  }

  //Show UID on serial monitor

  Serial.print("UID tag :");

  String content= "";

  byte letter;

  for (byte i = 0; i < mfrc522.uid.size; i++)

  {

     Serial.print(mfrc522.uid.uidByte[i] < 0x10 ? " 0" : " ");

     Serial.print(mfrc522.uid.uidByte[i], HEX);

     content.concat(String(mfrc522.uid.uidByte[i] < 0x10 ? " 0" : " "));

     content.concat(String(mfrc522.uid.uidByte[i], HEX));

  }

  Serial.println();

  Serial.print("Message : ");

  content.toUpperCase();

  if (content.substring(1) == "BD 31 15 2B") //change here the UID of the card/cards that you want to give access

  {

    Serial.println("Authorized access");

    Serial.println();

    delay(3000);

  }


 else   {

    Serial.println(" Access denied");

    delay(3000);

  }

}